Knowing how to clean a karaoke microphone keeps it looking good, feeling pleasant to hold and working properly for many parties to come. The good news is that the job takes only a few minutes and needs nothing more than a soft cloth, a little water and the instructions that came with your machine. This guide walks you through the microphone, the cables, the batteries and the machine itself, then gives you a simple routine for the end of the night.
Who this guide is for
This guide is for anyone with a home karaoke machine: families who sing most weekends, hosts who lend the mics to a room full of guests, and owners who want their setup to keep working without fuss. It explains how to clean a karaoke microphone, whether wired or wireless, and how to care for the base unit and its cables. Because every model is built a little differently, always treat your owner’s manual as the final word. Where this guide and your manual disagree, follow the manual.
What you need before you start
- A couple of soft, lint-free cloths, such as microfibre cloths
- A small bowl of clean water
- A dry towel to work on
- Your owner’s manual, printed or on your phone
- A soft, dry brush for dust, if your manual allows it
Avoid harsh household cleaners, scouring pads and anything abrasive. In addition, never spray liquid straight onto the microphone or the machine. Instead, apply a small amount to the cloth first.
How to clean a karaoke microphone step by step
A typical handheld karaoke mic has a handle and a round grille at the top. Inside the grille sits the part that picks up your voice, so the main rule is simple: keep moisture away from it.
- Switch it off. Turn the microphone off. For a wired mic, unplug the cable. For a wireless mic, take out the batteries if your manual says it is safe to do so.
- Wipe the handle. Dampen a cloth lightly with water and wring it out well. Then wipe the handle, avoiding buttons, switches and seams.
- Hold it upright. Keep the grille pointing up while you work. That way, any stray drop runs away from the head of the mic rather than into it.
- Clean the outside of the grille. Wipe the outside gently with the lightly damp cloth. If the grille unscrews and your manual allows it, you can remove it and clean it separately, following the manufacturer’s instructions.
- Do not clean inside the head. Leave the internal parts alone. Poking or wiping inside the grille can damage the microphone.
- Dry everything. Pat the handle and grille dry with a clean cloth, then let the mic air-dry fully before you refit the grille or switch it back on.
Removable foam windscreens
Some karaoke microphones come with a foam cover that slips over the grille. These covers soften breath noise and are easy to swap between singers.
- Check the manual first. Some manufacturers allow mild soap and water on foam covers, while others recommend plain water only, so follow the instructions for your model.
- Remove the cover gently. Ease it off rather than pulling hard, since foam can tear.
- Rinse and squeeze. Rinse it in water and press it gently between your palms. Avoid twisting or wringing.
- Air-dry completely. Leave it on a towel in a well-ventilated spot until it is fully dry before you put it back on the mic.
- Replace worn covers. If the foam starts to crumble or loses its shape, swap it for a replacement cover that fits your microphone.
Keeping a few spare covers lets each singer use a fresh one. It is a small step that keeps the mics feeling pleasant for everyone.
Keep liquids away from the setup
Drinks and karaoke often go together, but a spill can easily damage a machine. A few habits help a lot.
- Set up a separate drinks table away from the machine and the cables.
- Never rest a cup on top of the speaker or base unit.
- Ask singers to put their drink down before picking up the mic.
- If a spill happens, switch off and unplug the machine at once. Then wipe up what you can and check the manual before switching it back on.
Cable care and coiling
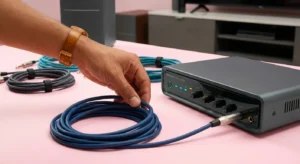
Wired mics and power leads take a lot of wear at parties. Good cable habits stop kinks and loose connections.
- Unplug by the plug. Always pull the connector, not the cable, when you disconnect.
- Wipe it down. Run a lightly damp cloth along the cable, then a dry one.
- Coil loosely. Wrap the cable in loose loops that follow its natural curve. Avoid wrapping it tightly around your elbow or around the mic itself.
- Secure the coil. Use a soft tie or hook-and-loop strap to hold it together.
- Route cables safely. During a party, run cables along the wall or under a rug runner so nobody trips over them.
Battery care for wireless microphones
Batteries are simple to look after once you know the basics.
- Disposable batteries: If you are putting the mics away for a long time, take the batteries out. This reduces the chance of a leak inside the battery compartment.
- Rechargeable mics: Follow your manual for charging and storage. Use the charger or cable that came with the microphone, or one the manufacturer recommends.
- Check the contacts: If a mic cuts out, look at the battery contacts. If they look dirty, switch off and wipe them gently with a dry cloth.
- Dispose of old batteries properly: Follow your local recycling guidance rather than putting them in household rubbish.
Storage away from heat and damp
Where you keep your machine matters as much as how you clean it.
- Store the machine and mics in a dry room, away from radiators, heaters and direct sunlight.
- Avoid damp spaces such as garages, sheds and basements that feel cold or musty.
- Keep the mics in their original box, a padded case or a drawer lined with a soft cloth.
- Cover the base unit with a light cloth to keep dust off between uses.
A simple after-party routine
A short routine at the end of each session keeps everything ready for next time. Think of it as how to clean a karaoke microphone, and everything around it, in one quick pass.
- Switch off and unplug the machine.
- Turn off the wireless mics and remove their batteries if you will not use them for a while.
- Pull off any foam covers and set them aside to rinse.
- Wipe each mic handle and the outside of each grille with a lightly damp cloth, then dry them.
- Wipe the cables and coil them loosely.
- Dust the base unit with a dry cloth.
- Pack everything away in a cool, dry place.
Troubleshooting checklist
| Problem | Likely cause | What to try |
|---|---|---|
| Mic sounds muffled after cleaning | Grille or foam cover still damp | Switch off and let it dry fully before trying again |
| Wireless mic cuts out | Weak batteries or dirty contacts | Fit fresh batteries or wipe the contacts with a dry cloth |
| Crackle when the cable moves | Worn or kinked cable | Try a different cable and coil it loosely in future |
| Foam cover looks flattened or crumbly | Normal wear | Replace it with a cover that fits your mic |
| Sticky buttons on the machine | Spilled drink | Unplug, wipe with a lightly damp cloth and check the manual |
If the sound still seems off once everything is clean, our guide to fixing karaoke sound problems covers settings and placement.
Where to read more: Shure guide to cleaning a wired microphone and Shure guide to cleaning a wireless handheld microphone.
Key takeaways
- Switch off first, use a lightly damp cloth, and keep moisture away from the head of the mic.
- Follow the manufacturer’s instructions for grilles and foam covers.
- Keep drinks on a separate table, well away from the machine.
- Coil cables loosely and unplug them by the connector.
- Remove disposable batteries before long storage and follow the manual for rechargeables.
- Store everything somewhere cool and dry.
Once you know how to clean a karaoke microphone and care for the machine, a few minutes after each party keeps your whole setup ready for the next sing-along.
Written by the Best Karaoke Machine Editorial desk. Disclosure: this guide contains no affiliate or sponsored links.