There’s nothing more frustrating than getting ready for a fantastic karaoke session only to be met with silence, garbled audio, or persistent echoes. While karaoke machines are designed for fun, occasional technical glitches can arise. Understanding how to fix common karaoke audio problems can save your night and ensure your performances are crystal clear. This guide from BestKaraokeMachine.net will help you diagnose and resolve the most frequent sound issues, getting you back to belting out your favorite tunes in no time.
The Silent Stage: No Sound at All
This is perhaps the most common and perplexing issue. When your karaoke machine produces no sound, start with the basics. Consequently, a systematic approach helps identify the root cause quickly.
1. Check All Power Connections
- Machine Power: Is your karaoke machine, amplifier, and active speakers (if separate) plugged in and turned on? Importantly, check for any illuminated power indicators.
- Outlet Functionality: Test the power outlet with another device to ensure it’s working. Sometimes, the issue is as simple as a dead outlet.
2. Verify Volume Levels
- Master Volume: Is the main volume knob on your machine or amplifier turned up sufficiently? Often, this is overlooked.
- Individual Channel Volumes: If you have separate controls for music, microphone(s), and effects, ensure they are not muted or set to zero. Specifically, many machines have distinct volume controls.
- External Device Volume: If you’re playing music from a phone or tablet, ensure its volume is turned up. In addition, check for any mute buttons on the external device itself.
3. Inspect Audio Cables and Connections
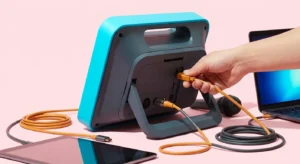
- Loose Connections: Gently push in all audio cables (RCA, 3.5mm, HDMI, optical) at both ends to ensure they are fully seated. A loose connection is a frequent culprit.
- Incorrect Inputs/Outputs: Are you connecting from an ‘OUT’ jack on one device to an ‘IN’ jack on another? For example, the karaoke player’s ‘AUDIO OUT’ should go to the amplifier’s ‘AUDIO IN’. Incorrect routing often leads to no sound.
- Damaged Cables: Try swapping out suspected faulty cables with known working ones. Frayed or bent cables can cause intermittent or no sound, or even static.
- Correct Input Selected: On your amplifier or TV, ensure you’ve selected the correct input source (e.g., ‘AUX’, ‘HDMI 1’, ‘CD’) corresponding to where your karaoke machine is connected. This is a critical step for signal flow.
4. Microphone-Specific Issues
- Wired Mics: Ensure the microphone is firmly plugged into the correct MIC IN jack. Test with another mic if available, as the microphone itself might be faulty.
- Wireless Mics: Check batteries. Ensure the wireless receiver is powered on and properly connected to the machine. Confirm the mic is paired with its receiver (often indicated by a light). Furthermore, ensure no other wireless devices are causing interference.
- Mic Volume: Is the microphone volume knob on the machine or mixer turned up? Many systems have a separate mic volume control, distinct from the music volume.
The Echo Chamber: Too Much Reverb or Feedback
While some reverb is good for vocals, excessive echo or screeching feedback can ruin a performance. Therefore, adjusting these settings is crucial for a pleasant experience.
1. Adjust Reverb/Echo Settings
- Most karaoke machines have a dedicated ‘Echo’ or ‘Reverb’ knob. Turn it down gradually until the sound is pleasing, not overwhelming.
- Remember, a little echo goes a long way. Too much makes vocals muddy and unintelligible. Consequently, finding the right balance enhances vocal presence.
2. Combatting Microphone Feedback
Microphone feedback is that piercing screech or hum that occurs when sound from the speakers re-enters the microphone, creating a loop. This is a common issue when trying to solve karaoke sound issues.
- Reposition Microphones: Move microphones further away from the speakers. Point them away from the speaker cones.
- Reduce Microphone Gain: Lower the microphone volume or gain on your machine.
- Adjust Speaker Placement: If possible, place speakers in front of or to the sides of the performers, rather than behind them.
- Avoid Pointing Mic at Speakers: Never point an active microphone directly at a speaker.
- Check Room Acoustics: Rooms with many hard, reflective surfaces can exacerbate feedback. Consider adding soft furnishings or curtains if feedback is a persistent problem.
Distorted or Garbled Audio: When Sound Isn’t Clear
When your music or vocals sound muddy, crackly, or generally unclear, it detracts significantly from the karaoke experience. Diagnosing distorted audio is an important step in learning how to fix common karaoke audio problems.
1. Check Input Overload
- Reduce Source Volume: If you’re playing music from an external device (phone, tablet), try lowering its output volume before it reaches your karaoke machine.
- Lower Machine Input Gain: Some machines have input gain controls. If the input signal is too strong, it can cause distortion.
- Avoid Clipping: Look for ‘clip’ or ‘peak’ indicator lights on your machine or amplifier. If these are frequently lighting up, your signal is too hot.
2. Inspect Speaker Connections and Quality
- Loose Speaker Wires: Ensure all speaker wires are securely connected to both the amplifier and the speakers. Loose connections can cause crackling.
- Damaged Speakers: If only one speaker sounds distorted, it might be damaged. Test it with another audio source or swap it with a known working speaker if possible.
- Speaker Impedance: Ensure your speakers’ impedance matches your amplifier’s output requirements. Mismatched impedance can lead to poor sound quality or damage.
3. Cable Integrity
As mentioned before, faulty cables are a common cause of poor sound quality. They can introduce static, hums, or complete signal loss. To troubleshoot karaoke audio, always consider the cables.
- Swap Cables: Replace audio cables one by one with known good ones to identify any faulty links.
- Shielding: Use good quality, shielded cables, especially for longer runs, to prevent interference.
4. Power Interference
Electrical interference can introduce unwanted hums or buzzes into your audio. This is particularly true if you have many devices plugged into the same power strip or circuit. Resolving karaoke machine problems often involves identifying power issues.
- Separate Power Sources: Try plugging your karaoke machine and amplifier into different power outlets or circuits if possible.
- Power Conditioners: A power conditioner or surge protector with noise filtering can help clean up your power supply.
- Ground Loop Isolators: If you hear a persistent hum, especially when connecting multiple devices, a ground loop isolator might be necessary. These are relatively inexpensive devices that can eliminate hum caused by ground loops.
Intermittent Sound or Dropouts
Nothing is more disruptive than sound that cuts in and out during a performance. This issue requires careful diagnosis to resolve karaoke sound issues effectively.
1. Wireless Connection Issues
- Range: Are your wireless microphones or devices too far from their receiver? Most wireless systems have a limited effective range.
- Interference: Other wireless devices (Wi-Fi routers, cordless phones, microwaves) operating on similar frequencies can cause dropouts. Try to move these devices or change the channel on your wireless karaoke system if possible.
- Batteries: Low batteries in wireless microphones are a prime suspect for intermittent sound. Change them regularly.
- Line of Sight: Ensure there are no major obstructions (walls, large furniture) between the wireless mic and its receiver.
2. Loose or Faulty Cables (Again!)
Seriously, cables are often the culprit. Even a slight wiggle can cause intermittent contact. To solve karaoke sound issues, always double-check these.
- Firm Connections: Re-seat all audio and power cables.
- Test Each Cable: Methodically replace each cable with a known good one to pinpoint the faulty connection.
3. Overheating
Electronic components can malfunction when they get too hot. This can lead to sound cutting out.
- Ventilation: Ensure your karaoke machine, amplifier, and other components have adequate ventilation. Don’t stack other electronics on top of them or place them in enclosed spaces.
- Dust: Dust buildup inside components can impede cooling. If you’re comfortable and knowledgeable, you might gently clean vents with compressed air (unplugged, of course).
Advanced Troubleshooting Tips for Persistent Issues
If the basic steps don’t resolve your problem, consider these more advanced techniques for how to fix common karaoke audio problems.
1. Isolate the Problematic Component
This involves disconnecting components one by one or testing them individually. For instance, if you have a separate amplifier and speakers, try connecting a different audio source (like a phone) directly to the amplifier to see if it produces sound. Similarly, connect your karaoke machine to a different set of speakers or an alternative input on your TV. This helps pinpoint whether the issue is with the machine, amplifier, speakers, or cables. This systematic isolation is key to troubleshooting karaoke audio effectively.
2. Consult the User Manual
Your karaoke machine’s user manual is a valuable resource. It often contains a dedicated troubleshooting section that addresses specific error codes or common problems unique to your model. Furthermore, it provides diagrams of correct connections. Always keep your manual handy for reference.
3. Update Firmware/Software
Some modern karaoke machines, especially those with smart features or digital interfaces, may have firmware updates available. These updates can resolve known bugs or improve audio performance. Check the manufacturer’s website for support. For example, Sony’s support page or LG’s support section often provide firmware updates for their audio devices.
4. Professional Help
If you’ve exhausted all troubleshooting steps and are still facing persistent audio problems, it might be time to contact the manufacturer’s support or seek assistance from a professional electronics repair technician. Sometimes, internal component failure requires expert intervention. Don’t hesitate to reach out if you’re unsure how to proceed; damaging your machine further is not ideal.
Conclusion
Encountering audio problems with your karaoke machine can be a real buzzkill, but most issues are surprisingly easy to diagnose and fix. By systematically checking power, volume, connections, and individual components, you can often pinpoint and resolve the problem yourself. Remember these tips on how to fix common karaoke audio problems to ensure your next singing session is filled with clear, vibrant sound, letting you focus on delivering a show-stopping performance. Happy singing!
FAQ
1. Why is my karaoke mic not working, but the music plays fine?
If your music is audible but the microphone isn’t, first check the mic’s power (batteries for wireless, connection for wired). Then, verify the microphone’s individual volume knob on the machine or mixer. Ensure it’s plugged into the correct ‘MIC IN’ jack. Finally, test with another microphone if available to rule out a faulty mic.
2. How can I reduce a buzzing or humming sound from my karaoke system?
A buzzing or humming sound often indicates electrical interference or a ground loop. Try plugging your karaoke machine and amplifier into different power outlets. Ensure all cables are securely connected and try replacing any suspect audio cables. A ground loop isolator can also effectively eliminate persistent hums.
3. What causes distorted vocals on a karaoke machine?
Distorted vocals typically result from an input signal that is too strong, causing ‘clipping’. Try lowering the microphone’s volume or gain on your karaoke machine. If you’re using an external mixer, ensure its gain staging is correct. Also, check for any damaged microphone cables or a faulty microphone itself.
4. My karaoke sound keeps cutting out. What should I do?
Intermittent sound can stem from various causes. For wireless systems, check battery levels, range, and potential interference from other devices. For wired setups, loose or damaged cables are common culprits; firmly re-seat or replace them. Additionally, ensure your equipment has proper ventilation to prevent overheating, which can cause sound dropouts.
5. How do I get rid of excessive echo in my karaoke performance?
Excessive echo, or reverb, can make vocals sound muddy. Locate the ‘Echo’ or ‘Reverb’ control knob on your karaoke machine or mixer and gradually turn it down. A subtle amount of echo is usually preferred for vocals, so experiment to find a pleasing level without overwhelming the sound.
Explore more: More from Best Karaoke Machine