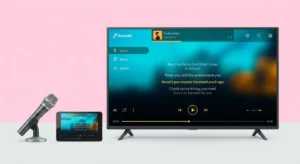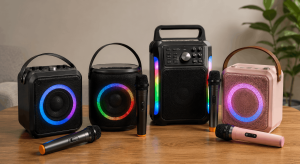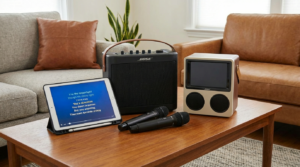
An HDMI karaoke setup can turn your television into the center of an enjoyable home singing system. HDMI carries digital video and audio through one convenient cable, which helps reduce connection clutter. However, microphones usually require a separate audio path, so understanding each device’s role is important.
Your TV can display lyrics from a laptop, streaming device, karaoke player, or other compatible source. Meanwhile, a mixer, karaoke machine, amplifier, or powered speaker can handle the singer’s microphone. Combining these components correctly gives you clear lyrics and balanced sound.
Fortunately, building a home karaoke system does not require professional audio knowledge. Start with the equipment you already own, then add only what your system needs. A few careful connection choices can prevent common problems such as delayed vocals, weak microphone volume, and missing audio.
Understand How HDMI Works With Karaoke
HDMI carries high-quality digital video and audio between compatible devices. For example, a laptop can send a karaoke video and its backing track directly to your television. Therefore, HDMI provides a simple way to display large, readable lyrics while playing music.
Microphones create a different challenge because most televisions cannot mix live microphone audio with an HDMI source. Plugging a microphone directly into a TV is rarely a complete solution. Instead, you normally need a karaoke machine, audio mixer, receiver, or powered speaker that accepts microphone input.
Think of your HDMI karaoke setup as two connected paths. The video path sends lyrics and images to your television, while the audio path manages backing music and live vocals. Depending on your equipment, those paths may eventually meet at a mixer, receiver, soundbar, or speaker system.
Before connecting anything, check the ports on every device. Look for HDMI input and output, HDMI ARC or eARC, optical audio, 3.5 mm connections, RCA ports, USB, and microphone inputs. Knowing what you have prevents you from buying adapters that your system does not need.
Also, check your device manuals before assuming that similarly shaped ports perform the same function. An HDMI input receives a signal, while an output sends one. Connecting two outputs together will not produce the result you want.
Choose the Right Source for Karaoke Songs
Your source device determines how you find songs and display lyrics. A laptop offers excellent flexibility because it can access browser-based karaoke videos, local media, and compatible karaoke software. Moreover, connecting a laptop to a television through HDMI is usually straightforward.
Streaming devices are another convenient choice. They can provide access to compatible karaoke apps and video services without leaving a computer beside the TV. However, microphone integration can become more complicated because many streaming devices focus on playback rather than live audio input.
A dedicated karaoke machine can simplify an HDMI karaoke setup because manufacturers design these devices specifically for singing. Many models combine microphone inputs, audio controls, effects, and video output. As a result, fewer separate components may be necessary.
Game consoles and compatible media players can also display karaoke content. Nevertheless, you should confirm app availability and connection options before building your entire system around one platform. Software support can change, and not every device handles external microphones easily.
Whichever source you choose, prioritize simple operation. Guests should be able to search for songs and follow lyrics without navigating complicated menus. A convenient interface often improves a party more than an unnecessary technical upgrade.
Connect Your Karaoke Source to the TV
For a basic connection, plug one end of an HDMI cable into your source device. Then connect the other end to an available HDMI input on your television. Select that input using the TV remote, and your source screen should appear.
If you use a laptop, adjust its display settings if the television does not show the image correctly. Mirroring the screen is often easiest for karaoke because both displays show the same lyrics. Alternatively, an extended display can keep controls on the laptop while showing lyrics only on the television.
Test your HDMI karaoke setup before adding microphones or extra speakers. Play a karaoke video and confirm that both the picture and backing track work correctly. This simple test makes troubleshooting easier because you can identify video problems before adding more equipment.
Use a reliable cable that comfortably reaches between devices without becoming stretched. However, an expensive premium cable is not automatically necessary for a basic home system. A properly certified cable that supports your required resolution and features is usually sufficient.
Finally, arrange cables so nobody can pull them accidentally during a performance. Karaoke guests tend to move around, especially during group songs. Keeping HDMI and power cables away from the singing area protects both your equipment and your guests.
Add Microphones Without Relying on the TV
Microphone connections cause many home karaoke problems. Most TVs are designed to reproduce finished audio rather than combine music with a live vocal signal. Therefore, a microphone mixer or karaoke-capable audio device is often the missing component.
A small karaoke mixer can accept wired or wireless microphone signals and let you adjust vocal levels. Some models also provide echo, reverb, tone controls, and multiple microphone inputs. Consequently, they offer more control than connecting everything directly to a television.
For an HDMI karaoke setup with wireless microphones, connect the microphone receiver to the compatible mixer or audio system. Then adjust the microphone level separately from the backing track. This arrangement makes it easier to prevent vocals from becoming too loud or disappearing under the music.
If your karaoke machine already includes microphone inputs, you may not need a separate mixer. Check whether the machine combines vocals and backing music before sending the final audio to your speakers. Integrated systems can reduce cables and make operation easier.
Always start microphone volume low during testing. Gradually increase it while someone speaks or sings at normal performance volume. This approach reduces sudden feedback and protects speakers from unexpectedly loud signals.
Route Audio to Better Speakers
Television speakers can work for casual singing, but they have limitations. Many TVs use small speakers designed mainly for dialogue and everyday entertainment. As a result, music may lack impact while live vocals can sound thin or harsh.
Powered speakers are a practical upgrade because they include amplification. Depending on the model, you can connect a mixer, karaoke machine, or microphone receiver directly. Furthermore, many powered speakers provide physical volume controls that are convenient during a party.
A soundbar can also improve an HDMI karaoke setup, especially for backing music. However, some soundbars introduce audio processing or latency that makes live vocals feel delayed. Therefore, test your specific combination before relying on it for an event.
Home theater receivers offer another option for users who already own them. HDMI switching, multiple speakers, and audio controls can make them useful for music playback. Still, integrating microphones may require a separate mixer because many receivers lack dedicated microphone inputs.
Avoid assuming that louder always means better. Set the backing track to a comfortable level, then bring the microphone up until vocals sit clearly above the music. Balanced audio makes karaoke more enjoyable and reduces the risk of distortion.
Use ARC or eARC When It Fits Your System
ARC stands for Audio Return Channel, while eARC is its newer enhanced version. These HDMI features allow compatible televisions to send audio back to a receiver or soundbar. Therefore, they can reduce the number of cables needed for certain home entertainment configurations.
For example, your source might connect directly to the TV while the TV sends audio to an eARC-compatible sound system. This configuration works well for movies and regular music. However, live karaoke microphones still require careful routing because the television may not combine their signal with the backing track.
When planning an HDMI karaoke setup around ARC or eARC, check the capabilities of every component. Your TV, cable, and audio device must support the features you intend to use. In addition, settings such as HDMI-CEC or audio output mode may need adjustment.
If you encounter silence, confirm that you connected the cable to the correct ARC or eARC ports. TVs often provide the feature on only one HDMI connection. Then check the audio output menu and select the external sound system.
Keep your signal path as simple as possible. Every additional device creates another potential compatibility problem. A straightforward system is usually easier to troubleshoot during a party.
Reduce Audio Delay and Lip-Sync Problems
Audio delay can ruin an otherwise excellent karaoke experience. Even a small delay between singing and hearing your voice can make timing difficult. Unfortunately, televisions, wireless connections, soundbars, and digital processing can all introduce latency.
For the lowest delay, route live microphone audio directly through a mixer and compatible speakers when possible. Meanwhile, use HDMI primarily for lyrics and video. This approach prevents the microphone signal from traveling through unnecessary television processing.
If your HDMI karaoke setup produces delayed backing music, check the audio settings on your television and sound system. Features such as virtual surround, enhanced processing, or certain sound modes may add latency. Switching to a simpler audio mode can sometimes improve synchronization.
Bluetooth speakers can also introduce noticeable delay. Bluetooth is convenient for casual music listening, but latency varies by device and codec. Therefore, wired audio connections are generally safer when precise timing matters.
Test synchronization by singing along with a familiar track. If your voice feels disconnected from the music, simplify the signal chain one device at a time. Finding the source of latency is easier when you change only one setting between tests.
Position the TV and Speakers Correctly
Your television should be easy for performers to see without forcing them to turn away from the audience. Position the lyrics display roughly in front of the main singing area. In addition, choose a text size and viewing distance that remain comfortable for different guests.
Speaker placement requires more care because microphones can create feedback. Keep speakers in front of the singer whenever practical rather than directly behind the microphone. This arrangement reduces the amount of amplified sound that returns to the microphone.
A well-planned HDMI karaoke setup also leaves enough open floor space for performers. Remove small furniture, loose rugs, and unnecessary cables from the singing area. Guests should be able to move without worrying about expensive equipment.
Avoid placing speakers inside enclosed cabinets. These spaces can make bass sound muddy and reduce clarity. Instead, give speakers enough room to project sound into the listening area.
Finally, consider neighbors and other household members. Speakers do not need maximum volume to create an energetic karaoke atmosphere. Proper positioning often produces better sound at a lower overall level.
Adjust Your TV and Audio Settings
Picture settings can improve lyric visibility. Brightness should suit the room, while excessive motion processing is unnecessary for most karaoke videos. If lyrics appear cropped, check the television’s aspect ratio or overscan settings.
Audio settings deserve equal attention. Some televisions allow you to choose between PCM, bitstream, passthrough, or other digital output modes. The best setting depends on your connected equipment, so consult the relevant manuals when audio does not work correctly.
Before your event, save or remember the settings that work best for your HDMI karaoke setup. This preparation prevents you from searching through menus while guests wait. Moreover, take a quick photo of important settings if you frequently switch the TV back to movie or gaming modes.
Balance music and vocals using your mixer or karaoke system rather than constantly changing the television volume. The singer should remain audible without overpowering the backing track. A small amount of echo or reverb can add depth, but too much reduces lyric clarity.
Run several songs during testing because recordings vary in loudness. A setting that works perfectly for one track may need a small adjustment for another. Keep the main controls accessible throughout the party.
Troubleshoot Common HDMI Karaoke Problems
If the television shows no picture, first confirm that you selected the correct HDMI input. Then reconnect both ends of the cable and restart the source device if necessary. Trying another HDMI port or cable can help identify a faulty connection.
When you have video but no sound, check the source’s audio output settings. Also, confirm whether your television is sending sound internally or to an external device. A mismatched digital audio format can sometimes cause silence.
If microphones work but the backing track does not, inspect the connections between your source, mixer, and speakers. Your HDMI karaoke setup may be sending the two audio signals along separate paths. Therefore, confirm exactly where those signals should combine.
Feedback usually sounds like a loud squeal or ringing tone. Lower the microphone volume and move the microphone farther from the speakers. In addition, avoid pointing the microphone directly toward a speaker.
For intermittent video, test another cable before changing several settings. Loose connections and damaged cables can cause brief black screens or signal loss. Simple troubleshooting often solves the problem faster than rebuilding the entire system.
Conclusion
A home karaoke system works best when video and audio have clear, simple routes. HDMI is excellent for displaying lyrics and carrying backing audio from compatible source devices. However, live microphones often need a mixer, karaoke machine, or suitable audio system before they reach your speakers.
Plan your HDMI karaoke setup around the equipment you already own. Connect and test the video first, add microphones next, and then optimize your speaker arrangement. This step-by-step method makes connection problems much easier to identify.
Most importantly, focus on low audio delay, readable lyrics, balanced vocals, and safe cable placement. You do not need the most expensive equipment to create an enjoyable home karaoke experience. A carefully connected system can provide reliable entertainment for solo practice, family nights, and lively parties.
FAQ
1. Can I connect a karaoke microphone directly to my TV?
Most televisions cannot properly mix a live microphone with karaoke music. Therefore, you will usually need a mixer, karaoke machine, or compatible speaker system. Check your TV manual before purchasing any adapters or microphone accessories.
2. Why is my microphone delayed when I sing?
Digital audio processing, Bluetooth connections, televisions, and soundbars can introduce latency. Routing the microphone directly through a mixer and wired speaker often reduces the delay. You can also disable unnecessary sound processing features.
3. Do I need a mixer for home karaoke?
A mixer is useful when your existing equipment cannot combine microphone audio with backing music. However, some dedicated karaoke machines already perform this function internally. Check your device’s microphone inputs and audio outputs before buying extra equipment.
4. Can I use a soundbar for karaoke?
A soundbar can reproduce karaoke music, but microphone support varies greatly. Some models also introduce noticeable audio delay because of digital processing. Therefore, test your system carefully before using a soundbar as the main karaoke speaker.
5. What is the easiest way to connect karaoke to a smart TV?
Connect a compatible laptop, karaoke player, or media device to the television through HDMI. Then route microphones through a karaoke mixer or suitable audio system. Keeping the video and live vocal paths simple makes setup and troubleshooting much easier.