Getting your new karaoke machine ready for its debut can seem daunting, but it doesn’t have to be. Whether you’ve picked up an all-in-one system, a component-based setup, or are planning to use a karaoke app with existing gear, knowing how to set up your karaoke machine correctly is key to a flawless performance. This guide will walk you through the process, ensuring you spend less time fumbling with wires and more time singing your heart out.
Choosing Your Karaoke Setup Type
Before you begin, identify what kind of karaoke system you have. This will dictate your setup process. Understanding your equipment is the first step towards a successful karaoke night. Consequently, consider the components you have or plan to acquire.
All-in-One Karaoke Machines
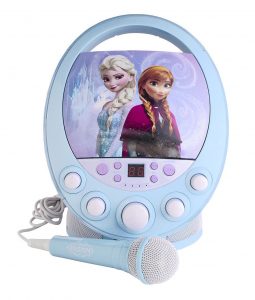
These are the simplest to get started with, often combining a player, amplifier, speaker, and microphone inputs into a single unit. They are perfect for family fun and casual gatherings. Think of compact systems like the Singing Machine or a basic Bluetooth-enabled portable unit. Moreover, their portability makes them ideal for various locations.
Component-Based Karaoke Systems
For enthusiasts or semi-professionals, this setup involves separate components: a karaoke player (or a device running karaoke software), an amplifier, speakers, and microphones. This offers greater flexibility and sound quality, allowing you to mix and match gear to your preferences. Furthermore, this approach often yields superior audio.
App-Driven Karaoke with Existing Audio Gear
Many people opt to use karaoke apps on their smart TVs, tablets, or computers, connecting them to their home theater system or dedicated PA speakers. This budget-friendly option leverages equipment you already own. In fact, it’s a popular choice for those already invested in a home audio setup.
Step-by-Step Setup for Each System
Let’s get down to the practical steps for each type of karaoke gear. Following these instructions carefully will help you avoid common pitfalls. Therefore, pay close attention to the details for your specific system.
Setting Up Your All-in-One Karaoke Machine
- Unbox and Position: Carefully remove all components. Place the machine on a stable surface, ensuring good ventilation. Keep it away from direct sunlight or heat sources. Proper placement prevents overheating and ensures optimal performance.
- Power Connection: Plug the power adapter into the machine and then into a wall outlet. Turn on the power switch, usually located on the back or front panel. Always use the provided power adapter to prevent damage.
- Microphone Connection: Insert your wired microphones into the designated MIC IN jacks. If using wireless mics, insert batteries, turn them on, and ensure they are paired (check the manual for specific pairing instructions). For best results, position microphones away from speakers to avoid feedback.
- Audio Output (Optional): Many all-in-one units have built-in speakers. If you want to use external speakers, connect the machine’s AUDIO OUT (RCA or 3.5mm) to your external speaker’s AUDIO IN. Adjust volume levels on both devices. This can significantly enhance sound quality.
- Video Output (Optional): If your machine has a screen or you want to display lyrics on a TV, connect the VIDEO OUT (RCA, HDMI) to your television’s corresponding input. Select the correct input source on your TV. Seeing lyrics clearly is essential for an enjoyable experience.
- Media Input: Insert a karaoke CD+G, connect a USB drive, or pair your Bluetooth device (phone, tablet) as per the machine’s instructions. Select your song and start singing! Consequently, your party can begin almost instantly.
Configuring Your Component-Based Karaoke System
This setup requires a bit more wiring, but the results are worth it. The enhanced sound and flexibility make it a favorite among serious karaoke enthusiasts. Furthermore, you can customize components to suit your specific audio preferences.
- Position Components: Place your karaoke player, amplifier, and speakers in their desired locations. Ensure adequate space for ventilation around the amplifier. Good placement minimizes interference and optimizes sound dispersion.
- Connect Karaoke Player to Amplifier: Use RCA cables to connect the AUDIO OUT jacks of your karaoke player (or computer/tablet with karaoke software) to an available AUDIO IN on your amplifier. Match the red and white connectors. This is the primary audio signal path.
- Connect Amplifier to Speakers: Use speaker wire to connect the amplifier’s SPEAKER OUT terminals to your passive speakers. Pay close attention to polarity (+ to +, – to -). Incorrect wiring can damage speakers or the amplifier. For active speakers, connect the amplifier’s pre-out or line-out to the active speaker’s input.
- Connect Microphones: Plug wired microphones into the MIC IN jacks on your amplifier or a separate mixer if you’re using one. For wireless microphones, connect the receiver to a MIC IN or LINE IN on your amplifier/mixer. Adjust microphone gain appropriately.
- Video Output: Connect the VIDEO OUT from your karaoke player (HDMI or RCA) to your TV or projector’s corresponding input. Select the correct input source on your display. This allows you to see lyrics and video content.
- Power Up and Test: Plug in all components to power outlets. Turn on the amplifier first, then the karaoke player. Test the microphones and play a song to ensure all connections are working. Adjust volume and tone controls as needed. This thorough check ensures everything is functioning correctly.
Setting Up App-Driven Karaoke with Existing Gear
This method utilizes your smart devices and home audio system. It’s a convenient way to enjoy karaoke without dedicated hardware. Moreover, it often provides access to a vast library of songs through various apps.
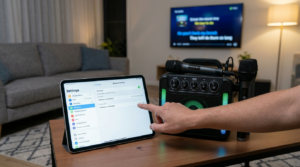
- Choose Your App and Device: Select a karaoke app (e.g., YouTube Karaoke, Smule, KaraFun) on your smart TV, tablet, or computer. Ensure your device has a stable internet connection for streaming. Many apps offer free and subscription-based options.
- Connect Device to Audio System:
- Smart TV: If your TV is connected to a soundbar or home theater system, the audio will typically route through it automatically.
- Tablet/Computer: Connect your device’s audio output (3.5mm jack, USB audio interface, or Bluetooth) to an available AUX IN or LINE IN on your home stereo, soundbar, or PA system.
- Microphone Integration: This is often the trickiest part.
- USB Microphones: Some apps and devices support USB microphones directly.
- Microphone Mixer: For better quality and control, connect a small microphone mixer (with phantom power if using condenser mics) to your audio system’s AUX IN. Plug your microphones into the mixer.
- Bluetooth Microphones: A few systems support direct Bluetooth microphone connection to the smart device, though latency can sometimes be an issue.
- Video Display: Use your smart TV or connect your tablet/computer to a larger screen via HDMI for lyrics display. This provides an immersive experience.
- Test Everything: Play a track through your chosen app. Check that audio is coming through your speakers and that your microphone is working. Adjust volumes on all connected devices. This final check ensures a smooth performance.
Essential Tips for the Best Karaoke Experience
Once you understand how to set up your karaoke machine, a few extra tips can elevate your performance. These suggestions apply regardless of your system type. Therefore, consider incorporating them into your routine.
Microphone Handling and Placement
Proper microphone technique is crucial. Hold the microphone about 1-2 inches from your mouth. Avoid pointing it directly at speakers to prevent feedback. If you experience feedback, try moving the microphone or reducing its volume. Furthermore, invest in good quality microphones for clearer vocals. You can find excellent options in our Rankings for Those who Want to Buy the Best Karaoke Machine.
Sound Adjustment and Equalization
Experiment with your system’s equalizer settings. Boost the mid-range for clearer vocals and adjust bass and treble to suit the music. Many amplifiers have specific karaoke modes or vocal enhancement features. Don’t be afraid to fine-tune the sound to your liking. A balanced sound makes a significant difference.
Speaker Placement for Optimal Sound
Position speakers at ear level and angled slightly towards your audience. Avoid placing them in corners, which can create boomy bass. For larger rooms, consider spreading speakers out for better sound distribution. The goal is to fill the room with clear, balanced audio. For more insights on audio equipment, a reputable source like Sweetwater’s articles on live sound can be helpful.
Managing Your Karaoke Library
Organize your karaoke tracks by artist, genre, or even difficulty. This makes it easier to find songs and keeps the party flowing. For digital libraries, create playlists for different moods or themes. A well-organized library enhances the user experience. Moreover, consider using a dedicated karaoke software if you have a large collection.
Dealing with Technical Glitches
If you encounter issues, start with basic troubleshooting. Check all cable connections. Restart components one by one. Consult your machine’s manual for specific error codes or common problems. Often, a simple reconnection or reboot solves the issue. For persistent problems, you might want to contact us for further assistance.
Advanced Considerations for Enthusiasts
For those looking to take their karaoke game to the next level, there are additional components and techniques to explore. These enhancements can significantly improve sound quality and performance control.
Adding a Mixer for More Control
A dedicated audio mixer offers granular control over microphone volumes, effects (like reverb or echo), and music levels. This is especially useful for multiple singers or if you want to integrate instruments. Mixers provide professional-grade sound shaping capabilities. B&H Photo Video’s guide on karaoke equipment offers more details on mixers.
Utilizing Effects Processors
External effects processors can add studio-quality reverb, delay, and other vocal enhancements. These can make even amateur singers sound more polished. Experiment with different effects to find what complements your voice and the music. Subtle effects are often more effective than overpowering ones.
Investing in Quality Microphones
Upgrading your microphones can dramatically improve vocal clarity and presence. Dynamic microphones are robust and versatile, while condenser microphones offer greater sensitivity and detail, ideal for home studio setups. Consider wired options for reliability or high-quality wireless systems for freedom of movement. Remember to check out our Graphic About the Best Singing Machines for top microphone recommendations.
Integrating a Monitor Speaker
A small monitor speaker positioned near the singer allows them to hear their own voice clearly, which is crucial for staying in tune and performing confidently. This is particularly beneficial in louder environments where the main speakers might be too far away. A monitor helps singers feel connected to their performance.
Power Conditioners and Surge Protectors
Protect your valuable karaoke equipment from power fluctuations and surges with a good quality power conditioner or surge protector. This extends the lifespan of your gear and prevents unexpected interruptions during a performance. It’s a small investment for peace of mind.
Maintaining Your Karaoke System
Knowing how to set up your karaoke machine is just the beginning. Proper maintenance ensures longevity and consistent performance. Regular care keeps your system in top condition for countless hours of entertainment.
Cleaning and Storage
Regularly wipe down your machine and components with a soft, dry cloth. Keep microphones clean and store them in a protective case. When not in use, cover your system to protect it from dust. Proper storage prevents damage and wear.
Software Updates
If your system relies on software (e.g., smart TV apps, computer programs), ensure it’s always up to date. Updates often include performance improvements, bug fixes, and new features. Keeping software current optimizes your experience.
Cable Management
Organize your cables using ties or wraps. This not only makes your setup look tidier but also prevents tangled wires, which can be a tripping hazard and make troubleshooting difficult. Good cable management improves safety and aesthetics.
Conclusion
Setting up your karaoke machine, whether it’s an all-in-one unit, a component-based system, or an app-driven setup, is a straightforward process once you know the steps. By following this guide, you can ensure a smooth, high-quality audio experience for your next singing session. Remember to connect everything correctly, test your setup, and make adjustments for optimal sound. With a little preparation, you’ll be ready to enjoy countless hours of musical fun. Now that you know how to set up your karaoke machine, grab that microphone, choose your favorite tune, and let your inner star shine!
FAQ
What are the essential components for a basic karaoke setup?
A basic setup typically includes a karaoke player (or a device with karaoke software), an amplifier, speakers, and microphones. Some systems combine several of these into one unit, making setup simpler.
Can I use my existing home stereo system for karaoke?
Yes, you can often connect a karaoke player or a device running a karaoke app to your home stereo’s auxiliary input. You’ll likely need a separate microphone mixer to integrate microphones effectively without damaging your stereo.
How do I prevent microphone feedback?
To avoid feedback, keep microphones away from speakers, reduce microphone volume if needed, and ensure your speakers aren’t pointed directly at the microphones. Adjusting equalization can also help.
What kind of songs can I use with my karaoke system?
Most karaoke systems support CD+G discs (which display lyrics), USB drives with MP3+G files, or streaming through apps. Ensure your chosen media format is compatible with your player. Many apps offer vast libraries of songs.
Is it difficult to connect a karaoke machine to a smart TV?
Connecting a karaoke machine to a smart TV is usually simple. Use an HDMI cable for modern machines or RCA cables for older ones to connect the machine’s video output to your TV’s input. Then, select the correct input source on your TV.