Wireless microphones can feel like magic when they work well. You pick one up, sing your heart out, and roam freely without worrying about cables. However, when they don’t connect properly, frustration sets in fast. Suddenly, karaoke night feels more like troubleshooting hour.
Learning how to pair wireless karaoke mics correctly changes everything. Once you understand the process, setup becomes quick and repeatable. Confidence replaces confusion. Singing starts sooner. That’s the goal.
Wireless mics rely on simple technology, yet many people overthink it. Pairing is not about advanced audio knowledge. Instead, it’s about understanding signals, channels, and timing. When those pieces align, the connection locks in.
This guide walks you through that process in plain language. By the end, you’ll know how to pair wireless karaoke mics smoothly, avoid common issues, and keep your setup stable every time.
Why Pairing Wireless Karaoke Mics Matters
Pairing isn’t optional. Without proper pairing, wireless microphones cannot communicate with the karaoke machine or receiver. That communication is what carries your voice from mic to speaker.
When pairing goes wrong, you might hear nothing. Alternatively, you might hear distortion, interference, or sudden dropouts. These issues interrupt performances and break momentum.
Correct pairing creates a clean signal. Voices sound clear. Volume remains consistent. Feedback stays controlled. As a result, performers relax and enjoy the moment.
If you want reliable karaoke sessions, learning how to pair wireless karaoke mics correctly is essential.
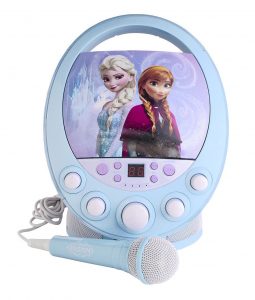
Understanding How Wireless Karaoke Mics Work
Wireless microphones operate using radio frequencies. Instead of sending sound through a cable, they transmit signals through the air.
Most karaoke mics work on VHF, UHF, or digital frequencies. Each system uses a transmitter inside the microphone and a receiver connected to the karaoke machine.
Pairing links the transmitter to the receiver. Think of it like tuning a radio. Both sides must match the same channel or frequency to communicate.
Some systems pair automatically. Others require manual steps. Understanding which type you have simplifies everything.
Identifying Your Karaoke Machine’s Mic Input
Before pairing begins, you need to know how your karaoke machine handles microphones.
Many machines include a built-in wireless receiver. These systems usually come with matching microphones designed to pair easily. Others require an external receiver plugged into a mic input.
Check the back or side of your karaoke machine. Look for labels like “Mic In,” “Wireless Receiver,” or “Audio Input.” These ports guide your setup.
Knowing where the signal enters the system helps you troubleshoot later if needed.
Preparing Before You Pair Wireless Karaoke Mics
Preparation prevents problems. Before pairing, take a few simple steps.
First, power everything off. Turning devices off prevents signal conflicts during pairing. Next, check batteries. Weak batteries cause unstable connections.
Then, move other wireless devices away. Routers, Bluetooth speakers, and phones can interfere with signals. Reducing interference improves pairing success.
Finally, place the microphones close to the receiver. Short distances strengthen initial connections.
These small steps make pairing faster and more reliable.
How to Pair Wireless Karaoke Mics Automatically
Many modern systems pair automatically. This design simplifies setup.
Start by turning on the karaoke machine. Then, power on the wireless microphones. In most cases, indicator lights will blink and then stabilize.
That steady light signals a successful connection. At this point, sound should pass through when you speak or sing.
Test the microphone at low volume first. Gradually increase volume to confirm clarity.
Automatic pairing works best when microphones are original to the system. Third-party mics may require manual pairing.
Manual Pairing for Wireless Karaoke Microphones
Some systems require manual pairing. This process sounds complex, but it’s usually straightforward.
First, turn on the receiver connected to the karaoke machine. Next, activate pairing mode. This step may involve pressing a small button labeled “Pair” or “Sync.”
Then, turn on the microphone. Hold it near the receiver while pairing completes. Indicator lights usually change color when pairing succeeds.
If pairing fails, repeat the process. Patience matters. Sometimes signals need a second attempt.
Manual pairing gives you control, especially in environments with multiple wireless systems.
Matching Channels and Frequencies
Channels matter more than many people realize. Wireless mics and receivers must share the same channel.
Some microphones include channel selection switches. Others cycle channels automatically. The receiver usually displays the active channel.
If sound doesn’t come through, mismatched channels are often the cause. Adjust the microphone channel to match the receiver.
This step is especially important when using multiple microphones. Each mic should have its own channel to avoid interference.
Once channels match, signals stabilize.
Pairing Multiple Wireless Karaoke Mics
Group performances often require more than one microphone. Pairing multiple wireless karaoke mics requires organization.
Start by pairing one microphone at a time. Complete the pairing process fully before adding the next mic.
Assign different channels to each microphone. This separation prevents cross-talk and signal overlap.
Test each mic individually. Then test them together. Adjust volumes evenly to balance sound.
When done correctly, multiple mics work seamlessly together.
Troubleshooting Common Pairing Problems
Even with preparation, issues can arise. Knowing how to troubleshoot saves time.
If there’s no sound, check mute settings first. Many microphones include mute switches that are easy to overlook.
If sound cuts out, check battery strength. Low power causes instability. Replacing batteries often solves the issue instantly.
Interference causes crackling or dropouts. Move away from Wi-Fi routers or switch channels if possible.
When pairing fails repeatedly, resetting the system helps. Power everything off, wait a minute, then restart.
Most problems have simple fixes.
Reducing Interference After Pairing
Successful pairing is only the beginning. Maintaining signal quality matters too.
Keep microphones within the recommended range. Walls and metal objects weaken signals.
Avoid placing receivers near electronic equipment. Distance reduces interference.
If your system allows frequency changes, choose less crowded channels. This option improves stability in busy environments.
Good placement keeps sound clean throughout the session.
Adjusting Volume and Gain After Pairing
Once paired, sound settings matter. Improper gain causes distortion or feedback.
Start with microphone volume low. Increase gradually while speaking. Find the point where sound feels clear and strong.
Adjust music volume separately. Vocals should sit comfortably above music without overpowering it.
Some systems include echo controls. Light echo enhances vocals. Too much creates muddiness.
Balanced sound improves confidence and enjoyment.
Why Wireless Karaoke Mics Boost Performance
Freedom changes how people perform. Wireless mics remove physical limitations.
Singers move naturally. Gestures feel expressive. Interaction increases.
That freedom boosts confidence. Performances feel energetic instead of stiff.
When paired correctly, wireless karaoke mics disappear from awareness. The technology fades into the background, leaving only the music.
Using Wireless Mics With Different Karaoke Systems
Wireless microphones work with many systems, but compatibility matters.
All-in-one karaoke machines often support specific mic models. Using matching equipment ensures easy pairing.
External receivers expand compatibility. These receivers plug into standard mic inputs.
Before purchasing new mics, confirm supported frequencies and connections. Compatibility prevents wasted effort.
When matched well, wireless mics integrate smoothly.
Safety Tips for Wireless Microphone Use
Wireless systems are simple, but care matters.
Avoid dropping microphones. Internal transmitters are sensitive.
Turn off microphones when not in use. This practice preserves battery life and prevents interference.
Store mics in dry environments. Moisture damages electronics.
These habits extend equipment lifespan.
Maintaining Consistent Pairing Over Time
Pairing should remain stable between sessions. However, some systems reset after power loss.
If your system forgets pairings, follow the pairing steps again calmly. Repetition builds familiarity.
Labeling channels helps when using multiple mics regularly. Consistency saves time.
With practice, pairing becomes second nature.
When to Replace or Upgrade Wireless Karaoke Mics
Not all problems are fixable. Aging equipment may struggle to hold connections.
If dropouts persist despite troubleshooting, consider upgrading. Newer systems offer better stability and battery efficiency.
Upgrades also improve sound clarity. Clear vocals elevate karaoke experiences.
Choosing reliable equipment supports stress-free singing.
Conclusion
Learning how to pair wireless karaoke mics removes one of the biggest barriers to great karaoke nights. With proper preparation, channel matching, and careful setup, pairing becomes quick and reliable. Once connected, wireless microphones unlock freedom, confidence, and energy. When technology fades away, music takes center stage. That’s when karaoke truly shines.
FAQ
1. Why won’t my wireless karaoke mic connect?
Common causes include low batteries, mismatched channels, or interference from nearby devices.
2. Can I pair any wireless mic with my karaoke machine?
Only compatible microphones or those using external receivers will work properly.
3. How far can wireless karaoke mics operate?
Most work reliably within 30 to 100 feet, depending on the system.
4. Do wireless mics need pairing every time?
Some systems remember pairings, while others require pairing after power loss.
5. How do I prevent interference during use?
Keep receivers away from routers and use separate channels for each microphone.