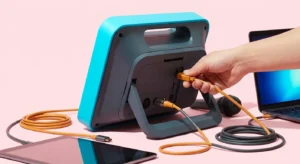
Are you ready to transform your living room into a stage but wondering how to connect karaoke machine to your existing setup? Whether you’ve just unboxed a brand-new system or you’re looking to integrate an older model with your smart TV, understanding the different connection types and best practices is essential for a flawless performance. At BestKaraokeMachine.net, we simplify the process, ensuring you spend less time troubleshooting and more time singing.
Understanding Your Connectivity Options
Modern karaoke machines offer a variety of ways to connect, reflecting the industry trend towards smart integration and diverse home entertainment setups. From traditional wired connections to advanced wireless options, knowing your machine’s capabilities is the first step. Therefore, it is important to identify what ports and wireless features your specific model includes.
Bluetooth Connectivity: The Wireless Wonder
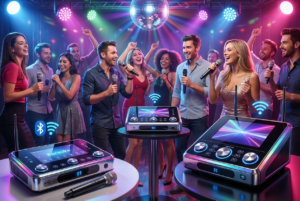
Many portable and all-in-one karaoke systems, which dominate the market with their ease of use and compact design, heavily rely on Bluetooth. Connecting via Bluetooth is straightforward.
1. Power On: Ensure your karaoke machine and the device you want to connect (e.g., smartphone, tablet, smart TV) are both powered on.
2. Activate Bluetooth: On your karaoke machine, enable Bluetooth pairing mode (often indicated by a flashing light or a specific button).
3. Search & Pair: On your device, go to Bluetooth settings, search for available devices, and select your karaoke machine’s name. Confirm the pairing if prompted.
Bluetooth is fantastic for convenience, especially with the rise of mobile-first experiences. It’s perfect for streaming music from apps directly to your karaoke system without a tangle of wires. However, sometimes Bluetooth range can be limited, so keep your devices relatively close.
Wi-Fi and Smart TV Integration
With the global karaoke market embracing technological advancements like AI-powered song recommendations and cloud-based libraries, Wi-Fi connectivity and smart TV integration are becoming standard. Many systems can connect directly to your home Wi-Fi network, allowing access to online song catalogs and streaming services.
- Smart TV Apps: Look for karaoke apps available on your smart TV’s app store (e.g., Spotify’s karaoke mode, YouTube). If your karaoke machine has an HDMI output, connect it to your TV. The TV then handles the video and often the audio, which can be routed back through your karaoke machine’s speakers or your home audio system.
- Casting/Screen Mirroring: Devices like Chromecast or Apple AirPlay allow you to cast karaoke app content from your phone or tablet to your smart TV, while your karaoke machine handles the microphones and vocal output. This method offers great flexibility.
Wired Connections: HDMI, RCA, and AUX
Despite the wireless trend, wired connections remain reliable for specific setups and older equipment. They often provide the most stable and highest quality audio and video signals. Therefore, understanding these options is crucial for versatile setup.
- HDMI: The gold standard for audio and video. If your karaoke machine has an HDMI output, connect it to your TV or home theater receiver for high-quality sound and picture. HDMI cables transmit both audio and video simultaneously, simplifying your setup.
- RCA (Red, White, Yellow): These are common for older machines and TVs. The yellow cable is for video, while red and white are for stereo audio. Connect the corresponding colored cables from your karaoke machine’s output to your TV’s or receiver’s input.
- AUX (3.5mm or 1/4 inch): An auxiliary input is ideal for connecting external audio sources like smartphones or MP3 players directly to your karaoke machine’s speakers. This is typically an audio-only connection, useful if you want to play music through the machine’s speakers without video.
Step-by-Step Guide to Connect Karaoke Machine to Different Devices
Properly connecting your karaoke system ensures optimal sound and video quality. Here, we outline the steps for various common setups. Understanding these processes will help you troubleshoot if issues arise.
Connecting to a Smart TV
Most modern setups involve a smart TV. Here’s how to ensure a smooth connection.
1. Identify Ports: Check the back of your karaoke machine and your smart TV for available ports. Look for HDMI, RCA, or optical audio ports.
2. HDMI Connection (Recommended): Use an HDMI cable to connect the HDMI OUT port on your karaoke machine to an HDMI IN port on your TV. Note the HDMI input number (e.g., HDMI 1, HDMI 2) on your TV. Then, select that input on your TV using your remote. This usually provides the best audio and video quality. For more information on HDMI standards, you can refer to HDMI.org.
3. RCA Connection (Alternative): If HDMI isn’t an option, use RCA cables. Connect the red, white, and yellow cables from your karaoke machine’s AV OUT to your TV’s AV IN ports. Select the corresponding AV input on your TV.
4. Audio Output: If your karaoke machine has its own speakers, the sound will likely come from them. Alternatively, if you want the sound to come from your TV’s speakers or a connected soundbar, ensure your TV’s audio output is configured correctly. Some karaoke machines also have an audio output that can connect to a soundbar or home theater system for enhanced sound. For detailed information on various sound systems, check out our Rankings for Those who Want to Buy the Best Karaoke Machine.
Connecting to a Sound System or Home Theater
For a more immersive audio experience, connecting your karaoke machine to an external sound system is ideal. This setup often provides richer sound and greater volume.
1. Identify Audio Outputs: Look for audio output ports on your karaoke machine. These might include RCA stereo outputs (red/white), optical audio, or even XLR outputs for professional-grade systems.
2. Connect to Receiver/Amplifier: Use appropriate cables to connect these outputs to the corresponding inputs on your home theater receiver or amplifier. For example, if your karaoke machine has RCA outputs, connect them to an available ‘Audio In’ or ‘Aux In’ on your receiver.
3. Microphone Connections: Ensure your microphones are properly connected to the karaoke machine. If your machine has separate microphone inputs, use those. Some advanced sound systems might allow direct microphone input, but usually, the karaoke machine processes the vocals.
4. Test Sound: Play some music and test the microphones to ensure all audio channels are working correctly through your sound system. Adjust volume levels on both the karaoke machine and the receiver.
Connecting to a Projector
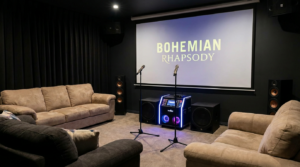
For large-scale karaoke parties, a projector can create a fantastic visual experience. This setup is popular for events and dedicated home entertainment rooms.
1. Video Output: Connect the video output of your karaoke machine (usually HDMI or RCA yellow) to the corresponding input on your projector. Most projectors will have multiple input options.
2. Audio Setup: Projectors typically have basic speakers, which are often insufficient for karaoke. Therefore, you will need to connect your karaoke machine’s audio output to an external sound system, as described in the previous section. This ensures high-quality sound that matches the large screen visuals.
3. Syncing: Sometimes, there might be a slight delay between video and audio with projectors. If you experience this, check your projector’s settings for any audio delay adjustments. A strong connection helps prevent such issues. It is important to ensure all cables are securely fastened.
Troubleshooting Common Connection Issues
Even with the best instructions, sometimes issues arise when you try to connect karaoke machine components. Here are some common problems and their solutions.
No Sound or Distorted Audio
- Check Cables: Ensure all audio cables (HDMI, RCA, AUX) are securely plugged into the correct input/output ports on both your karaoke machine and the receiving device (TV, sound system).
- Volume Levels: Verify that the volume is turned up on both your karaoke machine and the connected device. Also, check for any mute functions being active.
- Input Selection: Make sure your TV or sound system is set to the correct input source (e.g., HDMI 1, AV, Aux).
- Microphone Issues: If only microphones have no sound, check their power (if battery-operated) and ensure they are properly plugged into the karaoke machine.
No Video or Poor Picture Quality
- Cable Check: Confirm that video cables (HDMI, RCA yellow) are firmly connected to the correct video output on your karaoke machine and video input on your TV or projector.
- Input Selection: Double-check that your TV or projector is on the correct input source.
- Resolution Settings: Some karaoke machines or media players have adjustable resolution settings. If the picture is distorted, try a lower resolution setting on the karaoke machine.
- Damaged Cables: Inspect cables for any visible damage. A faulty cable can prevent proper signal transmission.
Bluetooth Pairing Problems
- Proximity: Ensure your Bluetooth devices are within range of each other, typically within 30 feet.
- Pairing Mode: Confirm that both devices are in Bluetooth pairing mode. Sometimes, turning Bluetooth off and on again on both devices can reset the connection.
- Forget Device: If you’ve connected before and are having trouble, try