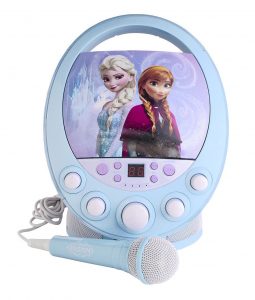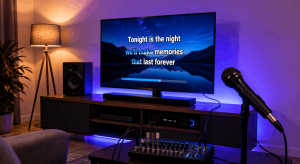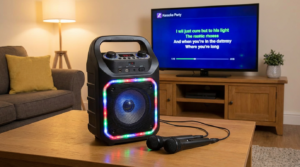
Enhancing your karaoke experience often involves upgrading your audio setup. While many karaoke machines come with built-in speakers, connecting them to a dedicated soundbar can significantly improve sound quality, offering clearer vocals and richer music. If you’re looking to boost your home karaoke sound, learning how to connect karaoke to soundbar is a straightforward process that can make a big difference. This guide will walk you through the essential steps and considerations to get your system sounding its best.
Why Connect Your Karaoke Machine to a Soundbar?
Many karaoke enthusiasts initially rely on their machine’s integrated speakers. However, these often lack the power and fidelity needed for a truly immersive singing experience. A soundbar, designed to enhance TV audio, offers superior sound reproduction, wider frequency response, and sometimes even surround sound capabilities. Consequently, connecting your karaoke machine to a soundbar elevates your performance, making your vocals sound professional and the background music more vibrant. This upgrade is particularly beneficial for party hosts or aspiring singers who value high-quality audio.
Furthermore, a soundbar can fill a room with sound more effectively than small, built-in speakers. This creates a more engaging atmosphere for everyone involved. For instance, when hosting a karaoke night, clear audio ensures every guest can hear the singer and the music without straining. Ultimately, investing a little time to set up your system correctly yields significant acoustic rewards.
Understanding Your Connection Options
Before you begin, it is important to understand the various ways you can link your karaoke machine to a soundbar. Different machines and soundbars offer diverse connection ports. Identifying these ports on both your devices is the crucial first step. Common options include analog connections like RCA or 3.5mm AUX, and digital connections such as optical audio or HDMI ARC. Wireless Bluetooth connectivity is also an option for modern devices. Knowing your available ports will help you select the correct cables and ensure a smooth setup process.
Each connection type offers different benefits regarding audio quality and ease of use. For example, digital connections generally provide higher fidelity sound compared to analog. However, analog connections are widely compatible and easy to troubleshoot. We will explore each of these in detail, ensuring you choose the best method to hook up your karaoke machine to your soundbar.
What You’ll Need to Connect Karaoke to Soundbar
Before you begin, gather the necessary components. You’ll need your karaoke machine, your soundbar, and the appropriate audio cables. The type of cable depends on the available ports on both your karaoke machine and soundbar. Common options include RCA cables (red and white connectors), a 3.5mm auxiliary (AUX) cable, or sometimes an optical audio cable. Some modern karaoke machines and soundbars may also support Bluetooth for wireless connection, but a wired connection generally offers more stable audio. In addition, you might need an adapter if your port types don’t match directly.
Always ensure your cables are in good condition. Frayed or damaged cables can lead to poor sound quality or no sound at all. Having a few different cable types on hand can be beneficial, especially if you are unsure which connection method will work best for your specific setup. This preparation ensures you can successfully connect karaoke to soundbar without unnecessary delays.
Step-by-Step Connection Guide: Wired Connections
Wired connections typically offer the most reliable and highest quality audio for your karaoke setup. Here’s how to proceed with the most common wired options.
1. Identify Available Ports
First, carefully inspect the back or sides of both your karaoke machine and your soundbar. Look for output ports on your karaoke machine, usually labeled "Audio Out," "Line Out," "Aux Out," or "RCA Out." Similarly, identify the input ports on your soundbar, which are often labeled "Audio In," "Aux In," "Line In," "Optical In," or "HDMI ARC." Note down the types of ports available on each device. This step is fundamental for selecting the correct cable.
2. RCA Cable Connection
If both your karaoke machine and soundbar have RCA ports, this is a straightforward connection. Connect the red and white RCA cables from the "Audio Out" on your karaoke machine to the corresponding "Audio In" on your soundbar. Make sure to match the colors (red to red, white to white) to ensure correct stereo sound. This analog connection is very common and provides good basic audio quality.
3. 3.5mm AUX Cable Connection
Many portable karaoke machines feature a 3.5mm (headphone jack) output. If your soundbar also has a 3.5mm input, simply connect them with a standard AUX cable. However, if your machine only has RCA outputs and your soundbar has a 3.5mm input, you will need an RCA to 3.5mm adapter cable. These adapters are widely available and relatively inexpensive. This method is convenient for many smaller setups.
4. Optical Cable Connection
For higher quality digital audio, consider using an optical audio cable if both your karaoke machine and soundbar have optical ports (often labeled "Optical Out" and "Optical In," or "TOSLINK"). Optical cables transmit digital audio signals, which can result in clearer sound with less interference. Before inserting, always ensure the small plastic covers on the ends of the optical cable are removed. Carefully align the connector and push it in until it clicks securely. This connection type is preferred for optimal audio fidelity.
5. HDMI ARC Connection (Advanced)
Some advanced karaoke machines and soundbars might support HDMI ARC (Audio Return Channel). If both devices have an HDMI port labeled "ARC," you can use a single HDMI cable to transmit both audio and sometimes even video. This is typically found on more premium equipment. Connect one end of the HDMI cable to the "HDMI ARC Out" on your karaoke machine (if applicable) and the other end to the "HDMI ARC In" on your soundbar. This method simplifies cabling and can offer excellent digital audio.
Step-by-Step Connection Guide: Wireless Bluetooth Connection
For a clutter-free setup, Bluetooth offers a convenient wireless option, provided both your karaoke machine and soundbar support it.
1. Activate Bluetooth on Your Soundbar
First, turn on your soundbar and put it into Bluetooth pairing mode. The exact steps vary by brand, but usually involve pressing a "Bluetooth" or "Pairing" button on the soundbar or its remote control. The indicator light on the soundbar will typically flash to show it’s ready to pair.
2. Pair Your Karaoke Machine
Next, access the Bluetooth settings on your karaoke machine. Scan for available devices. Your soundbar’s name should appear in the list. Select it to initiate the pairing process. Once connected, your karaoke machine’s display might show "Paired" or "Connected," and the soundbar’s indicator light will usually become solid. This wireless link makes it easy to connect karaoke to soundbar without physical cables.
Power On and Test Your Setup
After making all the necessary connections, it’s time to power on your devices and test the sound.
- Power On Devices: Turn on both your karaoke machine and your soundbar.
- Select Correct Input: On your soundbar, use its remote control or onboard buttons to select the correct input source. This is crucial. For example, if you used RCA cables, select "AUX," "Line In," or "RCA." If you used an optical cable, select "Optical." For Bluetooth, ensure "Bluetooth" input is chosen.
- Play Music and Adjust Volume: Play some music through your karaoke machine or sing into the microphone. Listen for sound coming from the soundbar. Adjust the volume levels on both your karaoke machine and the soundbar to a comfortable listening level.
If everything is connected correctly, you should immediately notice an improvement in sound quality. The music will sound fuller, and your vocals will be clearer. This test confirms that you have successfully managed to connect karaoke to soundbar.
Troubleshooting Tips for Common Issues
Sometimes, despite following all steps, you might encounter issues. Here are some common problems and their solutions:
No Sound Coming from the Soundbar
- Check Cables: First, double-check that all cables are securely plugged into the correct ports on both your karaoke machine and soundbar. Loose connections are a frequent culprit.
- Verify Input Source: Ensure the soundbar’s input source matches the connection type you used (e.g., "AUX," "Optical," "Bluetooth"). This is perhaps the most common oversight.
- Volume Levels: Check the volume levels on both your karaoke machine and the soundbar. Sometimes one device might be muted or set to a very low volume.
- Power Status: Confirm that both devices are powered on and not in standby mode.
Poor Sound Quality or Static
- Cable Condition: Inspect your audio cables for any damage or fraying. A faulty cable can introduce static or distortion. Replacing a suspect cable is a good troubleshooting step.
- Interference: If using a wireless Bluetooth connection, ensure both devices are within range and there aren’t too many obstacles or other wireless devices causing interference.
- Digital vs. Analog: If you’re using an analog connection (RCA or AUX), try a digital connection (optical or HDMI ARC) if available, as digital signals are less prone to interference.
Bluetooth Pairing Issues
- Proximity: Ensure your karaoke machine and soundbar are close to each other during the pairing process, ideally within a few feet.
- Forget Device: If previous pairing attempts failed, try "forgetting" the soundbar from your karaoke machine’s Bluetooth settings and starting the pairing process again.
- Reset Bluetooth: Sometimes, turning Bluetooth off and on again on both devices can resolve minor glitches.
Optimizing Your Karaoke Soundbar Setup
Once you successfully connect karaoke to soundbar, you can further optimize your audio for the best performance. Many soundbars come with various sound modes (e.g., Movie, Music, Voice). Experiment with these settings to find the one that best suits karaoke. The "Music" or "Voice" modes often enhance vocals and overall clarity. Additionally, some soundbars allow for bass and treble adjustments. Boosting the bass slightly can add richness to the music, while adjusting the treble can clarify vocals.
Consider the placement of your soundbar. For optimal sound dispersion, it should generally be placed centrally, below your TV or projection screen. This ensures the sound is directed towards your audience. Avoid placing it in enclosed cabinets, which can muffle the sound. Proper placement significantly contributes to the overall audio experience. For more tips on home audio setup, you might find resources like Cnet’s Soundbar Setup Guide helpful.
Finally, ensure your microphone is working correctly and positioned well. A good microphone technique, combined with a great soundbar, will make your karaoke performances truly shine. Regularly check your microphone’s battery levels if it’s wireless. Using a pop filter can also reduce harsh "P" and "B" sounds, further refining your vocal output. For an in-depth look at microphone best practices, websites like Shure’s Vocal Microphone Techniques offer valuable insights.
Conclusion
Connecting your karaoke machine to a soundbar is a fantastic way to elevate your home entertainment. By following this step-by-step guide, you can easily achieve clearer vocals, richer music, and a more immersive karaoke experience. Whether you opt for a wired connection for stability or a wireless Bluetooth setup for convenience, the result will be a noticeable improvement in sound quality. Remember to identify your ports, choose the right cables, and troubleshoot any issues methodically. Get ready to sing your heart out with professional-grade audio, making every performance memorable. Enjoy your enhanced karaoke setup!
Frequently Asked Questions (FAQ)
Can I use any soundbar with my karaoke machine?
Generally, yes, most soundbars can be connected to a karaoke machine. The key is to ensure both devices have compatible audio input/output ports (e.g., RCA, 3.5mm AUX, optical, or Bluetooth) so you can establish a connection using the appropriate cables or wireless pairing. Check your machine’s and soundbar’s specifications.
Is a wired connection better than Bluetooth for karaoke audio?
For karaoke, a wired connection (like optical or RCA) is often preferred for its stability and minimal latency. Bluetooth can sometimes introduce a slight delay between your singing and the sound output, which might be noticeable. However, for casual use, Bluetooth can be perfectly adequate and offers greater convenience.
Do I need a mixer if I connect my karaoke machine to a soundbar?
Most modern karaoke machines have built-in mixers that handle microphone and music levels. If your machine has separate microphone inputs and audio output, you likely won’t need an external mixer just to link it to a soundbar. A mixer becomes useful if you have multiple microphones or want more advanced audio control.
What if my karaoke machine only has HDMI output and my soundbar only has optical input?
In this scenario, you would need an HDMI audio extractor. This device takes the HDMI signal, separates the audio, and provides an optical audio output that you can then connect to your soundbar. Ensure the extractor supports the audio formats from your karaoke machine.
Will connecting to a soundbar make my microphone sound better?
Connecting to a soundbar will primarily improve the overall clarity and volume of the sound coming from your karaoke machine, which includes your microphone audio. While it won’t magically fix a low-quality microphone, a good soundbar will reproduce your microphone’s sound more accurately and powerfully than most built-in speakers, making your vocals sound clearer and fuller.
Explore more: More from Best Karaoke Machine