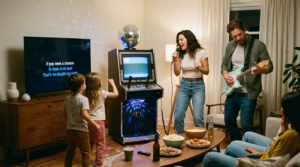
Are you ready to elevate your home singing experience? Learning to connect karaoke machine to TV, smart devices, or your favorite apps is essential for a truly immersive and modern home entertainment setup. With the global home entertainment market booming and consumers increasingly preferring smart integration, getting your karaoke system connected properly means unlocking a world of song choices and improved performance. BestKaraokeMachine.net is here to guide you through every wire, wireless signal, and app setting.
In fact, setting up your karaoke system correctly can dramatically improve your overall enjoyment. Furthermore, a well-connected setup ensures you get the best sound and video quality, making every performance feel professional. Consequently, understanding the various connection types is crucial for maximizing your machine’s potential.
Understanding Your Karaoke Machine’s Connection Options
Modern karaoke machines come equipped with a variety of ports and wireless capabilities designed for seamless integration. Before you begin, identify what connections your machine, TV, and smart devices offer. Common options include:
- HDMI: High-Definition Multimedia Interface provides the best audio and video quality with a single cable.
- RCA (Red, White, Yellow): Analog audio and video connections, common on older TVs.
- Bluetooth: For wireless audio streaming from smart devices.
- Wi-Fi: Enables internet connectivity for app integration and cloud-based song libraries.
- USB: For playing media from flash drives or connecting certain accessories.
Each connection type serves a specific purpose. For example, HDMI is ideal for high-fidelity experiences, while Bluetooth offers convenience for quick audio pairing. Knowing these options helps you choose the right method for your setup. Moreover, some machines offer a combination of these, providing greater flexibility.
How to Connect Karaoke Machine to TV: Your Step-by-Step Guide
Connecting your karaoke machine to your TV is usually the first step to a great performance. Here’s how:
1. HDMI Connection (Recommended for Quality)
If both your karaoke machine and TV have HDMI ports, this is your best bet for crisp audio and clear visuals.
- Locate Ports: Find the HDMI OUT port on your karaoke machine and an available HDMI IN port on your TV.
- Connect Cable: Insert one end of an HDMI cable into the karaoke machine’s HDMI OUT and the other into the TV’s HDMI IN.
- Select Input: Use your TV remote to select the corresponding HDMI input (e.g., HDMI 1, HDMI 2).
This method offers superior digital audio and video. Therefore, it is highly recommended for modern setups. You will notice a significant improvement in sound clarity and picture sharpness.
2. RCA Connection (For Older TVs or Specific Setups)
For TVs without HDMI, RCA cables are a reliable alternative.
- Match Colors: Connect the red, white, and yellow RCA plugs from your karaoke machine’s AV OUT to the matching red, white, and yellow AV IN ports on your TV.
- Select Input: Switch your TV’s input to ‘AV’ or ‘Video’.
While RCA provides analog signals, it is still a perfectly functional option for many older televisions. Ensure the colors are matched correctly for proper audio and video transmission.
3. Smart TV Integration via Apps or Screen Mirroring
Many newer karaoke systems and apps leverage smart TV capabilities, aligning with the trend of smart integration in home entertainment. Some karaoke apps offer direct smart TV versions, while others can be cast or mirrored from your mobile device. This allows you to display lyrics and visuals directly on your large screen.
- App Installation: Search for your preferred karaoke app (like Spotify’s new karaoke mode or YouTube Karaoke) directly on your smart TV’s app store.
- Screen Mirroring/Casting: For mobile-first experiences, use features like Apple AirPlay, Google Cast, or your TV’s built-in screen mirroring to project your phone or tablet’s display.
This method offers immense flexibility and access to vast song libraries. Consequently, it is a popular choice for those with smart TVs and mobile devices. Many modern karaoke machines are designed to seamlessly integrate with these smart features.
Connecting Your Karaoke Machine to Smart Devices and Apps
Beyond the television, integrating your karaoke system with smartphones, tablets, and dedicated apps opens up even more possibilities. This is especially true for those who enjoy the convenience of portable music libraries and digital controls.
Bluetooth Connectivity for Audio Streaming
Bluetooth is a common feature on many karaoke machines, enabling wireless audio playback from your smart devices. This means you can stream music from your phone or tablet directly through your karaoke machine’s speakers.
- Enable Bluetooth: Turn on Bluetooth on both your karaoke machine and your smart device.
- Pair Devices: On your smart device, search for available Bluetooth devices and select your karaoke machine.
- Start Streaming: Once paired, play music from any app on your smart device, and the audio will come through your karaoke system.
This is a quick and easy way to access your personal music collection. You can also use it to stream background music from services like Pandora or Apple Music. Furthermore, it eliminates the need for extra cables, keeping your setup tidy.
Wi-Fi and App Integration
Some advanced karaoke machines feature built-in Wi-Fi, allowing them to connect directly to the internet. This opens the door to cloud-based song libraries, online updates, and integration with specific karaoke apps.
- Connect to Wi-Fi: Access your karaoke machine’s settings and connect it to your home Wi-Fi network.
- Launch App: Open the machine’s native karaoke app or a compatible third-party application.
- Explore & Sing: Browse extensive song catalogs, create playlists, and enjoy online features.
This offers the most comprehensive song selection and often includes features like scoring and recording. For aspiring singers, this level of integration is a significant advantage. You can find more insights on top-rated machines in our rankings for those who want to buy the best karaoke machine.
Optimizing Your Karaoke Setup for Best Performance
Once you successfully connect karaoke machine to TV and other devices, consider these tips to enhance your experience further. Proper setup and optimization ensure every singing session is enjoyable.
Audio Output and Speaker Placement
The sound quality is paramount for karaoke. If your karaoke machine has its own speakers, position them strategically for optimal sound distribution. If you’re using your TV’s speakers, consider connecting external speakers or a soundbar to your TV for richer audio.
- External Speakers: Connect external speakers to your karaoke machine’s audio output (RCA, 3.5mm, or optical) for improved sound.
- TV Audio Settings: Adjust your TV’s audio settings to ‘External Speakers’ if you’re using a soundbar or home theater system.
Good speaker placement can dramatically improve the acoustics of your room. Moreover, investing in quality external speakers can transform your karaoke experience. Ensure all audio cables are securely connected to prevent sound interruptions.
Microphone Setup and Volume Control
Your microphones are key to a great performance. Always check their connection and adjust volume levels. Wireless microphones offer freedom of movement, while wired ones provide a stable connection.
- Wired Mics: Plug wired microphones into the designated MIC IN ports on your karaoke machine.
- Wireless Mics: Ensure wireless microphones are charged, paired with their receiver, and the receiver is connected to the machine.
- Balance Audio: Adjust microphone volume and music volume to find the perfect balance. This prevents feedback and ensures voices are clear.
Proper microphone handling and volume adjustments are crucial. This helps to avoid screeching feedback and ensures everyone can hear the vocals clearly. Furthermore, experimenting with echo and reverb settings can add a professional touch to your singing.
Troubleshooting Common Connection Issues
Even with the best instructions, you might encounter minor hiccups. Don’t worry, most issues are simple to resolve. Knowing how to troubleshoot can save you time and frustration.
No Video or Audio on TV
If you’ve connected everything but see or hear nothing, check these points:
- Input Selection: Double-check that your TV is on the correct input source (e.g., HDMI 1, AV).
- Cable Integrity: Ensure all cables (HDMI, RCA) are securely plugged in at both ends. Try a different cable if possible.
- Power: Confirm both your karaoke machine and TV are powered on.
Often, the problem is a simple oversight. Sometimes, a quick restart of both devices can resolve minor glitches. If you need further assistance, our contact us page can provide support.
Bluetooth Pairing Problems
If your smart device isn’t pairing with your karaoke machine:
- Proximity: Make sure the devices are close to each other.
- Other Devices: Disconnect any other Bluetooth devices that might be interfering.
- Restart Bluetooth: Turn Bluetooth off and on again on both devices.
Bluetooth can sometimes be finicky. Patience and a systematic approach usually resolve these issues. Check the manufacturer’s manual for specific pairing instructions if you’re still having trouble.
Embracing the Future of Karaoke Entertainment
The world of home entertainment is constantly evolving, and karaoke machines are no exception. From advanced smart features to seamless app integration, the ways to enjoy singing at home are becoming more diverse and accessible. Understanding how to connect your karaoke machine to various platforms ensures you stay at the forefront of this exciting trend.
By mastering these connection techniques, you’re not just setting up a device; you’re creating an experience. Whether it’s a family sing-along, a party with friends, or a solo practice session, a well-connected karaoke system delivers unparalleled fun. We encourage you to explore different setups and find what works best for your home. Remember, the goal is always seamless entertainment and unforgettable performances. For more general information and resources, visit our blog.
FAQs About Karaoke Machine Connections
How do I connect my karaoke system to my smart TV?
You can connect your karaoke system to a smart TV using an HDMI cable for the best quality, or via RCA cables for older TVs. For smart integration, you might install a karaoke app directly on your TV or use screen mirroring features like AirPlay or Google Cast from your mobile device to display content on the TV.
Can I use my phone as a song source for my karaoke device?
Yes, many karaoke devices support Bluetooth connectivity, allowing you to wirelessly stream music from your smartphone or tablet. Additionally, some advanced machines feature Wi-Fi and dedicated apps that let you access song libraries directly from your phone.
What cables do I need to link my singing machine to a television?
The most common cables you’ll need are an HDMI cable for modern TVs, which provides both audio and video. For older televisions, you might use RCA cables (red, white, and yellow) for analog audio and video connections. Always check your machine and TV’s ports to determine the best cable type.
My TV shows no signal after connecting my karaoke player. What should I do?
First, ensure your TV is set to the correct input source (e.g., HDMI 1, AV). Next, check that all cables are securely plugged into both the karaoke player and the TV. You can also try restarting both devices or using a different cable to rule out a faulty connection.
Is it better to use a wired or wireless microphone with my setup?
Both wired and wireless microphones have their advantages. Wired microphones offer a stable connection and generally don’t require batteries. Wireless microphones provide greater freedom of movement, which is excellent for performances, but they require charging and can sometimes experience interference. Your choice depends on your preference for stability versus mobility.