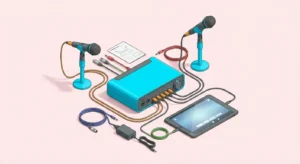
Karaoke TV sound issues can appear just when everyone is ready to sing. You may see lyrics perfectly while hearing no music, weak vocals, or delayed audio. Fortunately, many problems come from simple connections or settings that take only minutes to check.
Modern karaoke setups often combine several devices. Your system may include a smart TV, karaoke machine, microphones, mixer, soundbar, receiver, or powered speaker. Therefore, one incorrect setting can interrupt audio even when every device appears to work.
The fastest solution is to troubleshoot in a clear order. Start with volume and cables before changing advanced audio settings. Then test each part separately so you can identify exactly where the signal stops working.
Start With the Fastest Sound Checks
Before disconnecting your entire system, check every volume control. Your TV, karaoke machine, mixer, microphone receiver, and speakers may each have independent levels. One muted device can make the whole setup appear broken.
Next, play regular television content or a familiar video. If you hear normal audio, your TV speakers or external sound system probably work correctly. Therefore, you can focus on the karaoke source and its connections.
When karaoke TV sound issues affect both music and vocals, inspect the main audio path first. Confirm that HDMI, optical, RCA, or AUX cables sit firmly inside their ports. A cable can look connected while remaining slightly loose.
Restarting equipment can also solve temporary communication errors. Turn off the TV and karaoke source, then disconnect them from power briefly. Afterward, reconnect the equipment and switch on the TV before starting the karaoke device.
Finally, check the selected inputs. Your television must display the correct HDMI source, while an external speaker must use the correct audio input. These basic checks solve many problems without requiring deeper changes.
Check HDMI Connections and Audio Output
HDMI can carry both digital video and audio through one cable. However, a successful picture does not always guarantee compatible sound. Your source device may send an audio format that another component cannot decode.
First, reconnect both ends of the HDMI cable. Then try another HDMI input on your television if one is available. You can also test a different cable to rule out physical damage.
Some karaoke TV sound issues begin after users change TV audio settings. Open your television’s sound menu and confirm whether audio should play through internal speakers, HDMI ARC, eARC, optical output, or another connected device. Choose the output that matches your actual system.
If your television provides digital audio format options, you may see choices such as PCM, Auto, or Passthrough. PCM can sometimes improve compatibility with simple stereo karaoke equipment. However, the correct choice depends on your devices and their supported formats.
Test the karaoke source directly on the television before adding a receiver or soundbar. If sound works with the simpler connection, add other components one at a time. This method quickly reveals which device causes the failure.
Fix Microphone Audio That Cannot Be Heard
A common problem occurs when the backing track works but the microphone remains silent. Most televisions cannot accept and mix a standard live microphone signal directly. Therefore, microphones usually need a karaoke machine, mixer, amplifier, or compatible powered speaker.
Start by checking the microphone itself. Make sure it is switched on, charged, or fitted with working batteries. For wireless systems, confirm that the microphone and receiver are paired correctly.
Next, raise the microphone level gradually on your karaoke equipment. Do not assume the television’s volume controls microphone loudness. In many systems, TV volume changes the backing track while the mixer controls live vocals separately.
Karaoke TV sound issues can also occur when users expect HDMI to combine signals automatically. For example, a laptop may send music to the television while a wireless microphone connects to an unrelated receiver. Unless those signals meet at the correct mixer or audio device, you may hear only one source.
Test the microphone without music. Speak into it while adjusting its dedicated channel. Once the voice works clearly, add the backing track and balance both levels.
Solve Music Without Vocal Sound
If you hear karaoke music but not the singer, trace the microphone signal from beginning to end. Start with the microphone, then check its receiver, mixer, amplifier, and speaker. Every link must pass the live vocal signal correctly.
Wireless microphone receivers often have their own output level. Make sure the receiver connects to an actual microphone or line input that supports its signal. In addition, check whether the mixer channel has a mute button or level control.
For wired microphones, test another cable when possible. Microphone cables can fail internally even when they look undamaged. A known working microphone can also help determine whether the original mic is faulty.
Some karaoke TV sound issues happen because users connect microphones to one speaker while sending music somewhere else. The result can be unbalanced sound or missing vocals. Ideally, combine the music and microphone signals before sending the final mix to the main speakers.
Once both signals work, adjust them carefully. Keep the music at a comfortable level, then raise the vocal until words remain easy to understand. Avoid solving weak vocals by immediately turning everything to maximum volume.
Fix Lyrics With No Backing Music
Seeing karaoke lyrics without hearing the song usually points to an audio routing problem. First, verify that the karaoke video actually contains audio. Play another known track before changing your equipment.
Next, inspect the source device’s sound output. A laptop, streaming device, or karaoke player may continue sending audio to headphones or another connected device. Select the television or intended HDMI output instead.
If karaoke TV sound issues started after connecting Bluetooth headphones or speakers, disconnect them temporarily. Some devices automatically redirect sound to the most recently connected wireless output. As a result, the television displays video while audio plays somewhere else.
Check your television’s speaker settings as well. If the TV expects an external soundbar that is currently off, you may hear nothing. Switching temporarily to internal TV speakers can help isolate the problem.
Once sound returns, reconnect external equipment one component at a time. This process is slower than changing several settings together, but it provides a clear answer. You will know exactly which connection causes the audio to disappear.
Reduce Karaoke Audio Delay and Echo
Latency is one of the most distracting karaoke problems. You sing a word, but your amplified voice reaches you slightly later. Even a short delay can make it difficult to stay in rhythm.
Digital processing often causes this problem. Smart televisions, soundbars, wireless speakers, and receivers may process audio before reproducing it. Therefore, a complicated signal path can increase delay.
When karaoke TV sound issues involve latency, route live microphones directly through a mixer and wired powered speakers when possible. Keep the microphone signal away from unnecessary TV processing. The television can still display lyrics while your audio system handles the live performance.
Try disabling virtual surround, sound enhancement, or similar processing features. Some equipment also provides a game mode or low-latency mode that reduces processing. Test each option because results vary between devices.
Bluetooth speakers are convenient, but they can introduce noticeable delay. For karaoke, a wired connection is usually more predictable. If timing matters, use Bluetooth mainly for situations where its latency is not distracting.
Troubleshoot ARC and eARC Problems
HDMI ARC and eARC allow compatible televisions to send audio to soundbars and receivers. These features can simplify entertainment systems by reducing cable clutter. However, incorrect settings can also create confusing audio problems.
First, confirm that your HDMI cable uses the TV port labeled ARC or eARC. Many televisions support audio return through only one HDMI connection. Your soundbar or receiver must also use its compatible output.
Some karaoke TV sound issues appear because HDMI-CEC settings are disabled. Manufacturers use different names for CEC, so check your television manual if necessary. Enabling the required control feature may help the TV communicate with connected audio equipment.
Next, verify the TV’s audio output selection. Choose ARC or eARC when that is how your external sound system connects. If the system remains silent, test standard ARC settings or PCM audio where your equipment supports them.
Restart all connected devices after changing major HDMI settings. HDMI handshakes sometimes need a fresh connection before devices recognize each other correctly. Powering equipment on in a different order can also resolve temporary detection problems.
Stop Feedback, Squealing, and Distorted Vocals
Feedback produces a loud ringing or squealing sound when amplified audio re-enters the microphone. It can happen quickly when singers move close to speakers. Fortunately, positioning and sensible volume control can reduce the risk.
Place your main speakers in front of the singer rather than behind the microphone. Also, avoid pointing the microphone directly toward a speaker. Increasing the distance between them usually provides more usable volume before feedback begins.
If karaoke TV sound issues include distorted vocals, lower the microphone gain first. A signal can distort before it even reaches the speaker. Therefore, reducing speaker volume alone may not solve the problem.
Echo and reverb can also make vocals unclear when used excessively. Start with the effect turned low, then increase it gradually. You want enough depth to make singing enjoyable without burying the words.
Encourage singers to keep the microphone reasonably close to their mouths. Holding it too far away often causes people to increase the gain excessively. A consistent microphone position usually produces clearer vocals with less feedback.
Check Soundbars and External Speakers
Soundbars improve movie and television audio, but karaoke creates different requirements. A soundbar may add processing that delays live vocals. Furthermore, many models lack dedicated microphone inputs.
If your backing music works through the soundbar but microphones do not, inspect your signal routing. The microphone may need to enter a mixer before the combined audio reaches your speaker system. Connecting a mic to an unrelated device will not automatically add it to the TV sound.
Karaoke TV sound issues may also result from incompatible audio formats. If a soundbar remains silent, test the television’s PCM output setting where supported. Then confirm that the correct soundbar input is selected.
Powered PA speakers can provide a simpler option for frequent karaoke users. Many accept mixer or microphone connections directly and provide straightforward physical controls. However, you may still use the television solely for displaying lyrics.
Whatever speaker system you choose, test it at realistic volume. A setup that works quietly may reveal feedback or distortion when turned up. Early testing gives you time to correct those problems before guests arrive.
Use a Simple Signal Path for Reliable Karaoke
Complicated setups create more places for something to fail. Whenever possible, use the shortest practical route between your karaoke source, mixer, and speakers. This approach also makes troubleshooting much faster.
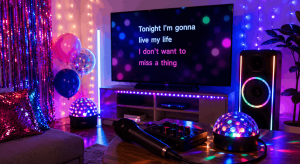
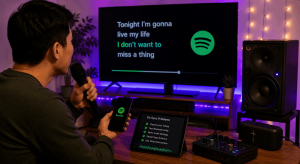
For example, you might send video from a laptop to the TV through HDMI. Meanwhile, route music and microphone audio through a suitable mixer and powered speaker. The television handles lyrics while dedicated audio equipment handles sound.
If karaoke TV sound issues keep returning, draw a quick connection diagram. Write down where the video travels and where each audio signal travels. This simple map often reveals a device that does not belong in the path.
Labeling cables can also help if you regularly disconnect your system. Small labels such as TV, mixer, speaker, and microphone receiver reduce setup mistakes. In addition, store adapters with the equipment they support.
Once you find a configuration that works, avoid unnecessary changes before a party. Save important TV settings or photograph them for reference. A reliable setup is more valuable than constantly adding new features.
Create a Fast Pre-Party Sound Checklist
Testing your system before guests arrive can prevent most last-minute problems. Start by playing one familiar karaoke track and confirming that the television displays lyrics correctly. Then listen for clear backing music.
Next, test every microphone individually. Check volume, wireless range, batteries, and vocal effects. If you use two microphones, make sure they can operate at the same time.
Listen carefully for karaoke TV sound issues such as delay, distortion, weak vocals, or missing channels. Walk around the room while someone sings. This test can reveal feedback spots and wireless signal problems.
Check cables and power connections after testing. Keep loose cords away from walkways and drinks. Also, charge any rechargeable microphones or portable speakers before the event.
Finally, keep essential controls within easy reach. You should be able to adjust music, microphone volume, and echo without navigating several menus. Simple controls make it easier to keep the party moving.
Conclusion
Most home karaoke sound failures have a logical cause. Loose cables, incorrect audio outputs, muted microphone channels, incompatible formats, and excessive digital processing account for many common problems. Therefore, systematic troubleshooting works better than randomly changing settings.
Start with basic connections and volume controls whenever karaoke TV sound issues appear. Test the television, karaoke source, microphones, mixer, and speakers separately. Then reconnect them one at a time until you identify the problem.
A simple signal path also improves long-term reliability. Use HDMI where it works best for video and compatible audio, while giving live microphones an appropriate mixer or karaoke system. With a tested setup and a short pre-party checklist, you can spend less time fixing sound and more time singing.
FAQ
1. Why can I see karaoke lyrics but hear no sound?
Your source may be sending audio to another output, or the TV may have the wrong speaker setting selected. First, test another video and check the source’s audio output. Then confirm the television is using the intended speakers.
2. Why does my TV play music but not my microphone?
Most televisions cannot directly mix a standard live microphone with incoming karaoke music. You may need a mixer, karaoke machine, or compatible powered speaker. Test the microphone separately before combining it with the backing track.
3. How can I reduce microphone delay while singing?
Use a wired audio path whenever possible and reduce unnecessary digital processing. Routing microphones directly through a mixer and powered speaker often helps. Bluetooth and some soundbars may introduce additional latency.
4. Why does my microphone make a loud squealing noise?
The microphone is probably picking up amplified sound from the speakers and creating feedback. Move the speaker in front of the singer and lower microphone gain. Also, avoid pointing the microphone toward the speaker.
5. Should I use PCM for karaoke audio?
PCM can improve compatibility with some stereo karaoke systems, TVs, and soundbars. However, the best setting depends on your specific equipment. Check the manuals and test PCM if other digital audio formats produce silence or compatibility problems.